I started yoga for flexibility at 44 because I wanted to do the splits. I had absolutely no experience and had never done the splits before. Guess what? After about six months of daily training, I got into the splits (I couldn’t stay there long, mind you). So, I persisted in my training to achieve the splits with better form and sat there for a longer time. I also decided to improve my overall flexibility to do other cool advanced yoga poses, not just the splits. That’s what today’s yoga stretches for flexibility are all about! They are an assortment of my favorite stretches to improve your overall flexibility.
How to Effectively Use Yoga Stretches for Flexibility
Now, you will find that there are various ways to train for increased flexibility. Try various routines with different instructors and see what works best. As for me, here’s what I discovered on how to use yoga stretches for flexibility effectively:
- I prefer holding each stretch for at least one minute rather than only a few breaths.
- Passive stretches seem more effective and restorative than active stretches.
- Some yoga stretches will improve your flexibility in multiple areas of your body, so I tend to focus on those stretches.
- Beginners can stretch for 15 minutes a day, but as you advance, you will find that progress is slower, so 30 minutes daily is a decent goal.
- Consistency is key. Find a way to make stretching enjoyable so you rarely skip a day (listen to music or watch your favorite show as you stretch).
How to Use My Favorite Yoga Stretches for Flexibility
You can use today’s routine when you need a change from your regular training routine. I usually alternate training for the splits and for back flexibility using my Moving With Intention routines because my goal is to achieve all the advanced yoga asanas.
I divided my Moving With Intention program into three stages because as you advance, your training needs change. That being said, at this point, I often go back and forth between stage two and three sessions.
Check out my program and give it a try! I am surprised at the benefits I have noticed from working on my flexibility. Here are a few examples:
✔️Improved energy
✔️Improved mood
✔️Increased confidence
✔️Improved posture
✔️Reduced aches and pains
I used to think stretching was boring! I used always to skip it at the end of my workouts! It’s pretty hilarious now! I love stretching and I enjoy finding new ways to improve my training schedule for better results in less time. Moreover, tracking your progress makes it even more fun and motivating!
However, if your goal is simply to increase your overall flexibility, you will do well simply using today’s yoga stretches for flexibility as well as my Full-Body Flexibility Routine (With Handy PDF) and How to Increase Your Flexibility With Yoga. Try various flexibility routines off YouTube and have fun!
Yoga Stretches for Flexibility
My favorite yoga stretches for flexibility keep evolving. You will likely notice the same thing. However, my guiding principles don’t (like resting longer in passive stretches). Today’s routine reflects the stretches I have been enjoying most lately.
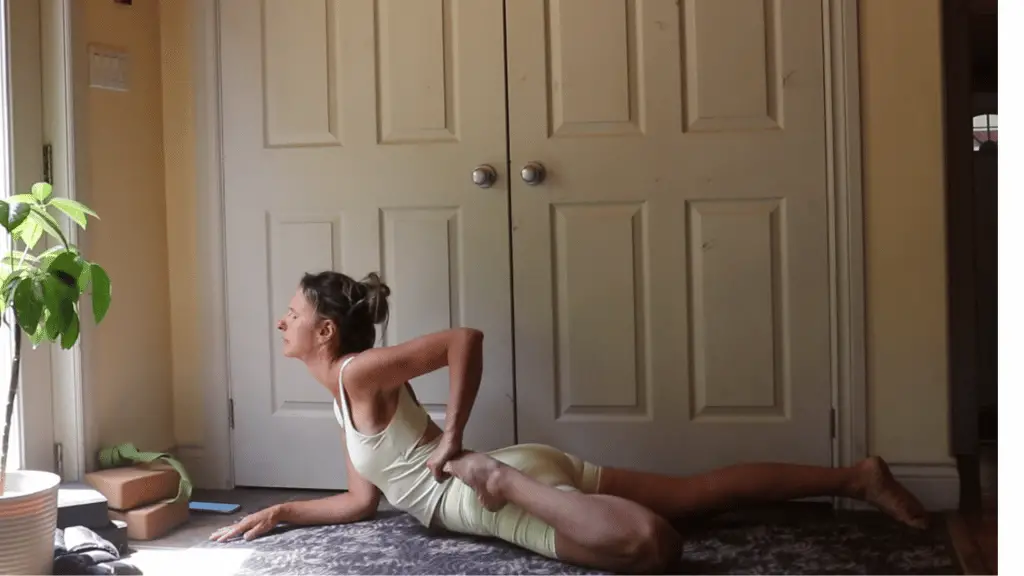
Half Frog (Ardha Bhekasana)
The half-frog will stretch your quads, back, front body, and shoulders!
Here’s how to do the half-frog pose:
- Begin in the sphinx pose, pressing the tops of your feet on the mat.
- Keep your left elbow under your left shoulder, but turn your left hand to the right.
- Press in your left forearm as you open up your chest.
- Sinch your waist by feeling your belly button pressing towards your spine.
- Bend your right knee and grab your right foot with your right hand.
- Turn your right hand so that your fingers point forward, and press your right foot to feel the stretch in your quads.
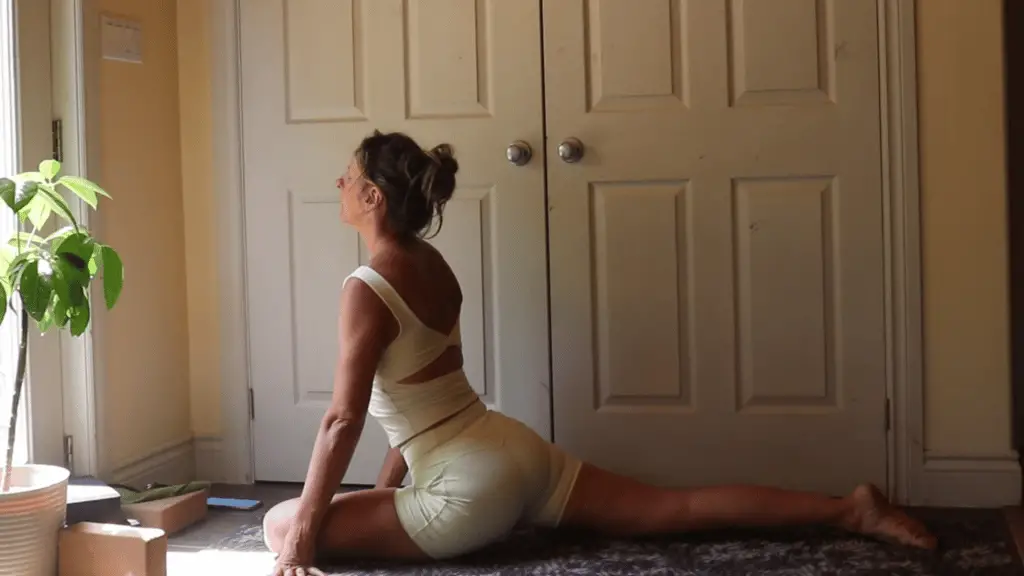
Pigeon (Eka Pada Rajakapotasana)
The pigeon pose has been on my favorite yoga stretches for flexibility list forever! It is so effective for stretching your quads, inner and outer hips, as well as your back, shoulders, and front body! Here’s how to do it:
- From all four, bring your right knee just behind your right wrist.
- Bring your right ankle somewhere in front of your right hip (how close or far to your hip will depend on your flexibility and how the pose feels).
- Scissor your hips together as you lift through your chest. lengthen your spine and press your belly button against your spine.
- As you progress in your flexibility, you can bend your left knee to hold your left foot in your left hand and even in your left elbow.
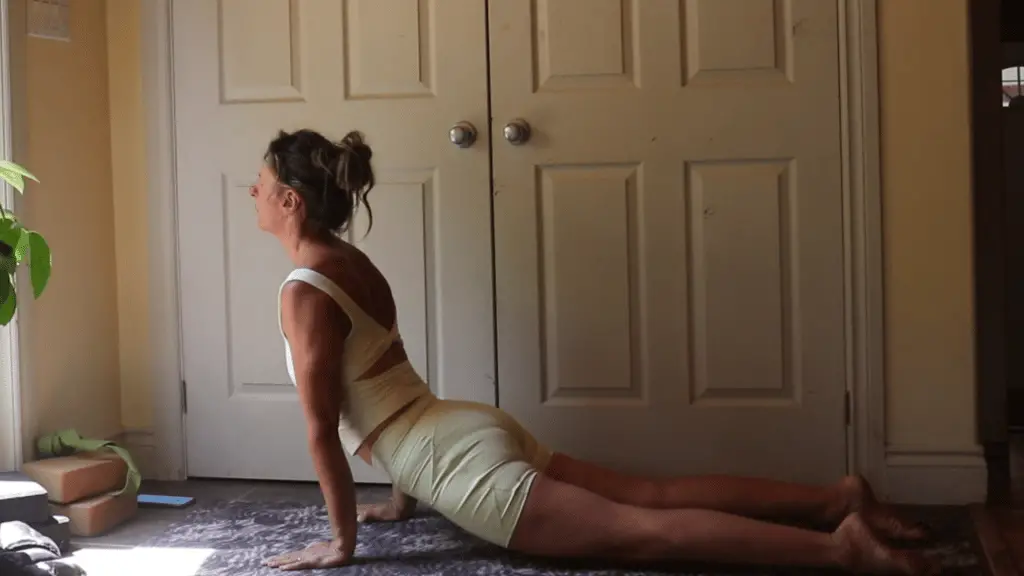
Upward Facing Dog
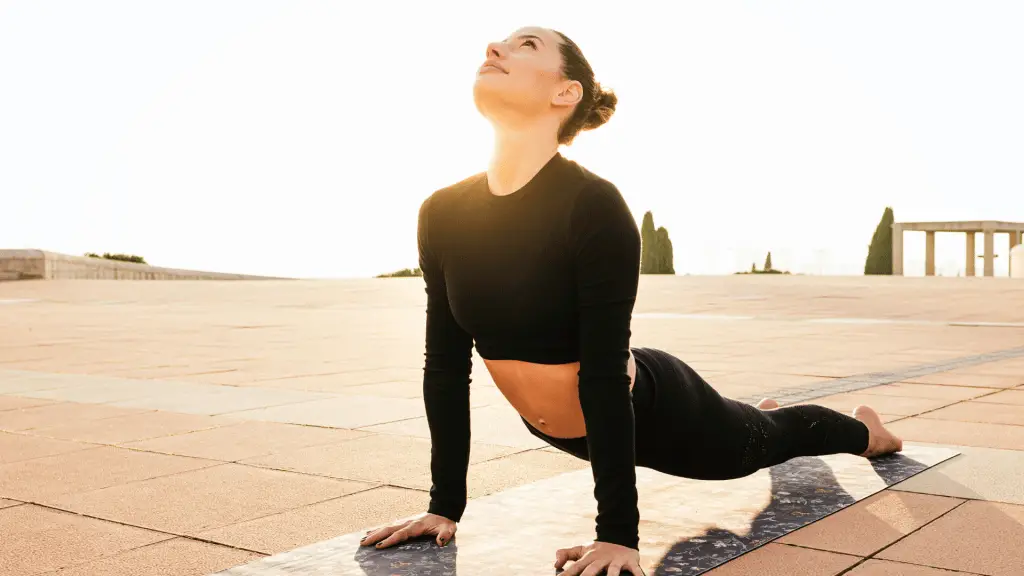
For a good while, I had the upward-facing dog wrong. I didn’t realize that your thighs were not resting on the mat as you were charging through your legs to keep them straight. Here’s how to do this pose:
- Begin on your belly with your feet hip distance apart.
- Bring your hands under your armpits and lift while pressing through the tops of your feet.
- Keep your shoulders down and your chest lifted.
- Tuck in your chin slightly.
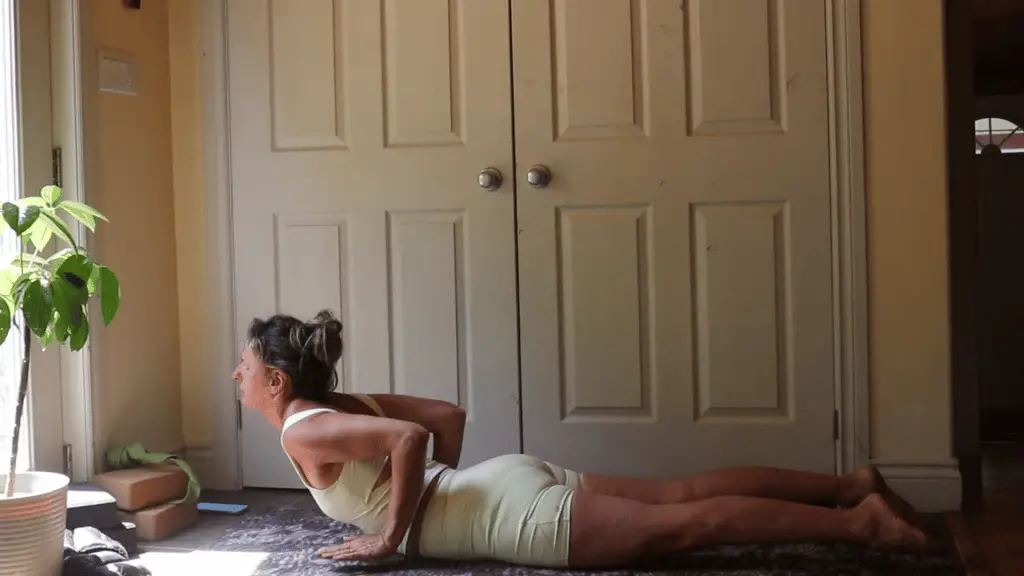
Active Cobra
I discovered the active cobra recently. It is technically not a yoga pose, but it is inspired by the cobra pose (Bhujangasana). What I love about it is how it improves your back strength. Many yoga back stretches also require a lot of back strength. For many of us, back strength is lacking. Here’s how you do the active cobra:
- Start the same way you would for cobra, with your hands under your armpits.
- Instead of lifting your upper body by pressing through the palm of your hands, lift your hands slightly off the mat and use your back strength to lift your chest up.
Lizard Pose (Utthan Pristhasana)
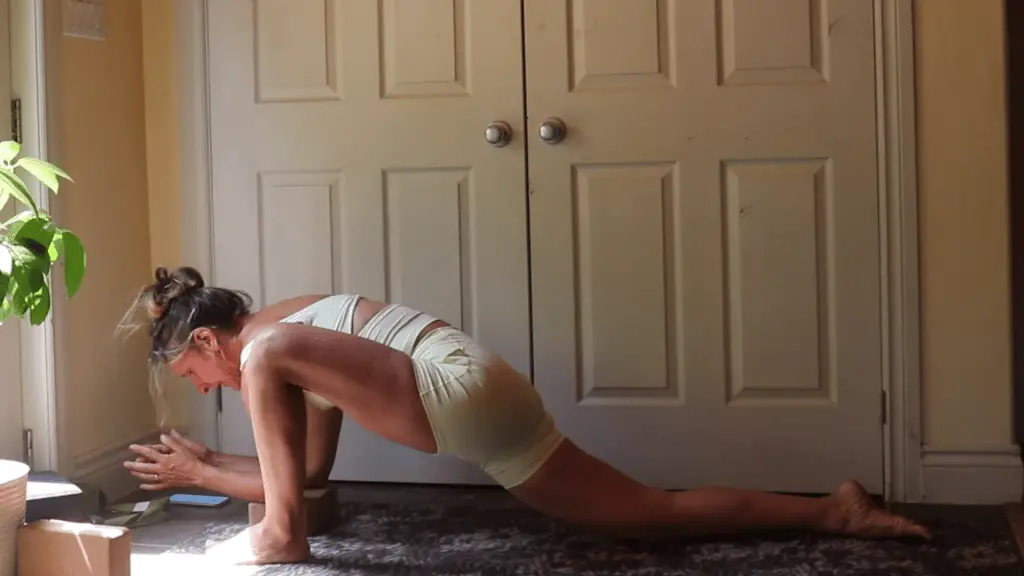
After all this time, the lizard pose is still one of my favorite yoga stretches for flexibility. I love how it can be made more challenging depending on which variation you are using:
- Lunge forward by stepping your right foot in front, keeping your feet hip-distance apart.
- Bring your hands down on the mat as you lower your left knee.
- Lift and lower your left knee a few times, keeping your toes tucked.
- Bring your elbows on the mat or a yoga block while keeping your left knee lifted.
- Stay there or lower your left knee.
- You can also bend your left leg and hold your left foot with your right hand to stretch your quads.
Wheel (Urdhva Dhanurasana)
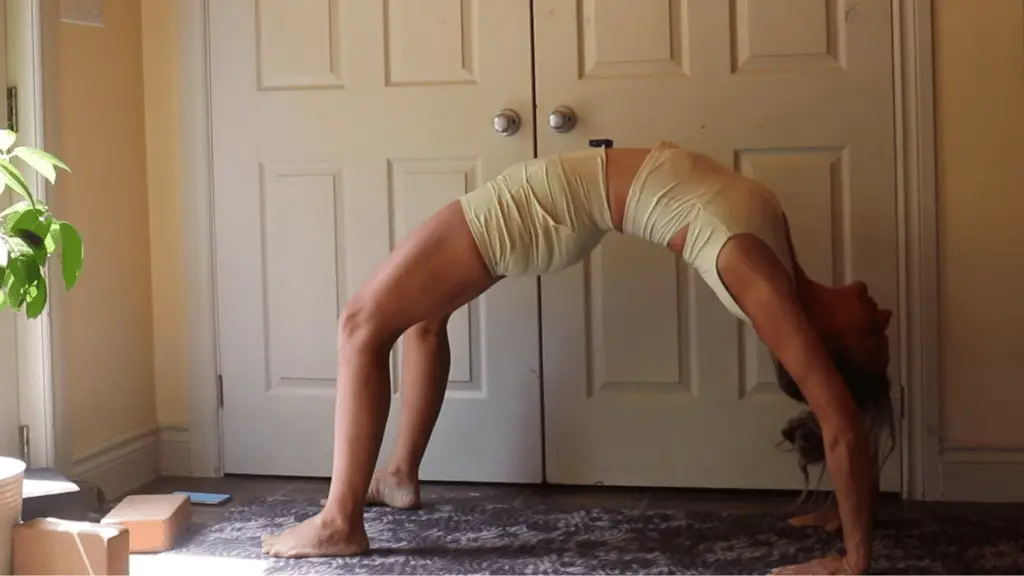
The wheel may be too advanced for beginner yogis. It’s ok, do the bridge if you can’t get in the wheel. I wanted to include the wheel as a yoga stretch for flexibility because it is the most effective way to increase flexibility in your back, shoulders, front body, and hip flexors. Moreover, improving your arms, shoulders, and back strength is excellent. It is the one most energizing yoga pose, in my opinion!
Here’s how to do it:
- Lie on your back and bend your knees to bring your feet hip-distance apart near your buttocks.
Tuck your shoulders back. - Lift your hips by pressing through your heels.
- See if you can graze your heels with your fingertips and just the distance as needed.
- Open your chest further as you press through your heels.
- Bring your hands on each side of your head with your fingers pointing towards your shoulders.
- Lifter to the crown of your head without letting your elbows flare out.
- Readjust the position of your hands if needed and lift into wheel pose.
Forward Fold (Uttasana)
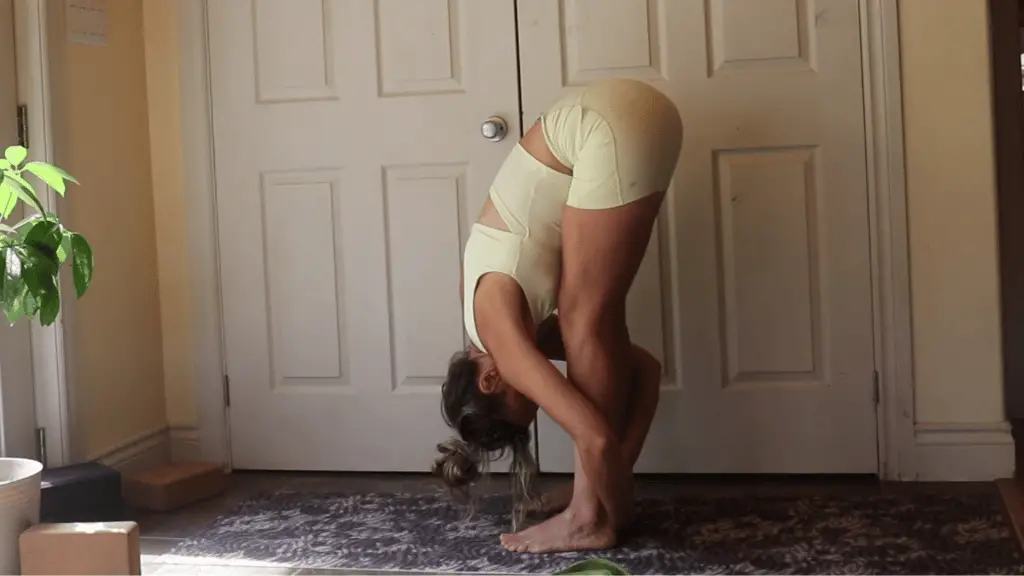
Ending this routine with two excellent hamstring stretches, let’s start with the forward fold. The forward fold is another one of those yoga stretches for flexibility that can always be made more challenging depending on how deep you get:
- Stand tall with your feet hip-distance apart.
- Bend at the hips to lower your hands to the mat.
- Keep engaging your abs as you lift your tailbone towards the sky.
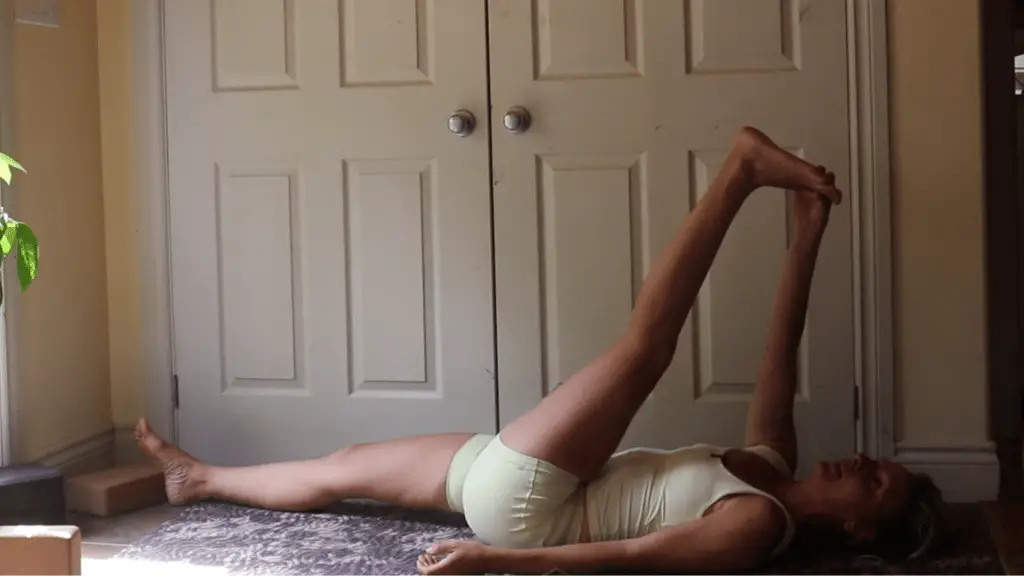
Reclined Big Toe Pose (Supta Padangusthasana)
The reclined big toe pose is still challenging even though I can now bring my head to my knee in pyramid pose. The reclined big toe pose is like the forward fold in that you can really make it deeper and deeper:
- Begin on your back.
- Lift your right leg and wrap it with a strap, or hold your right foot with one of your hands.
- Straighten your right leg and pull it towards you to stretch your hamstrings.
Yoga Stretches for Flexibility Video Routine
